Many striking and iconic landscape photographs are centered around magnificent mountain peaks. With their grand vistas and eye-popping peaks, mountains provide an ideal setting for nature and landscape photography, while also presenting some distinct challenges. In this post I’ve provided 7 tips to help you get the best results when you’re photographing mountain landscapes.
- Planning & Preparation: Plan ahead so you can be in the right place at the right time, waiting for the desired light to happen.
Before you head out to shoot mountain landscapes, some basic planning and preparation will improve your trip and your photographs. Plan your route and the time it will take to reach your destination – especially if you will have to do a lot of hiking. Advance planning can help you be in the right spot at the right time and avoid wasted time and energy wandering around trying to find the shot that you want. National Geographic Topo! mapping software provides all USGS topo maps for each state in one application that allows you to choose routes, calculate mileage and elevation gain and print maps. Free online mapping alternatives can be found at www.caltopo.com and www.hillmap.com. Google Earth is also an excellent planning tool when researching routes.
Lighting and weather conditions can be challenging in the alpine environment. High mountain summits can block the sun, valleys can be thrown into deep shadow and there is always the potential for dramatic shifts in weather. Carefully watching the weather forecast and visualizing potential scenes in potential light are key to a successful mountain photo trip. I’ve found the Weather Underground and Storm Radar apps to be very useful and The Photographer’s Ephemeris (TPE) is a fantastic tool for planning outdoor photography in natural light. It allows you to see how light will fall on the land at any time, day or night, anywhere on earth.
- Focus on the Light: Pay attention to the quality, direction, and temperature of light for better mountain landscape photographs.
Is the light harsh midday sun, the soft “golden hour” light around sunrise and sunset, or from an overcast or cloudy day? What direction is the light coming from – front, back, or the side of the subject? Is it the warm light of sunrise, the neutral light of mid-day, or the bluer light at dusk? It is important to consider and understand the impact these various lighting conditions will have on your mountain landscape photographs.
It is best to avoid shooting in midday light, especially on sunny days. Midday light’s neutral color lacks “mood” and its brightness and frontal light tends to obscure the textures and subtle details of the mountain peaks. As with most landscape photography, the preferred time to shoot is in the “golden hour” – just after sunrise or before sunset. The warm, colored light spreading across the landscape is beautiful and makes for a fantastic scene – especially when combined with an interesting foreground, like a lake, river, or some wildflowers, or a compelling cloud formation for added drama. When photographing in the mountains don’t forget that the surrounding peaks could block the sun and shorten, or even eliminate, the “golden hour”. While this is not always the case a little advance research and planning ahead of time can help you get that sunrise or sunset shot you were after.
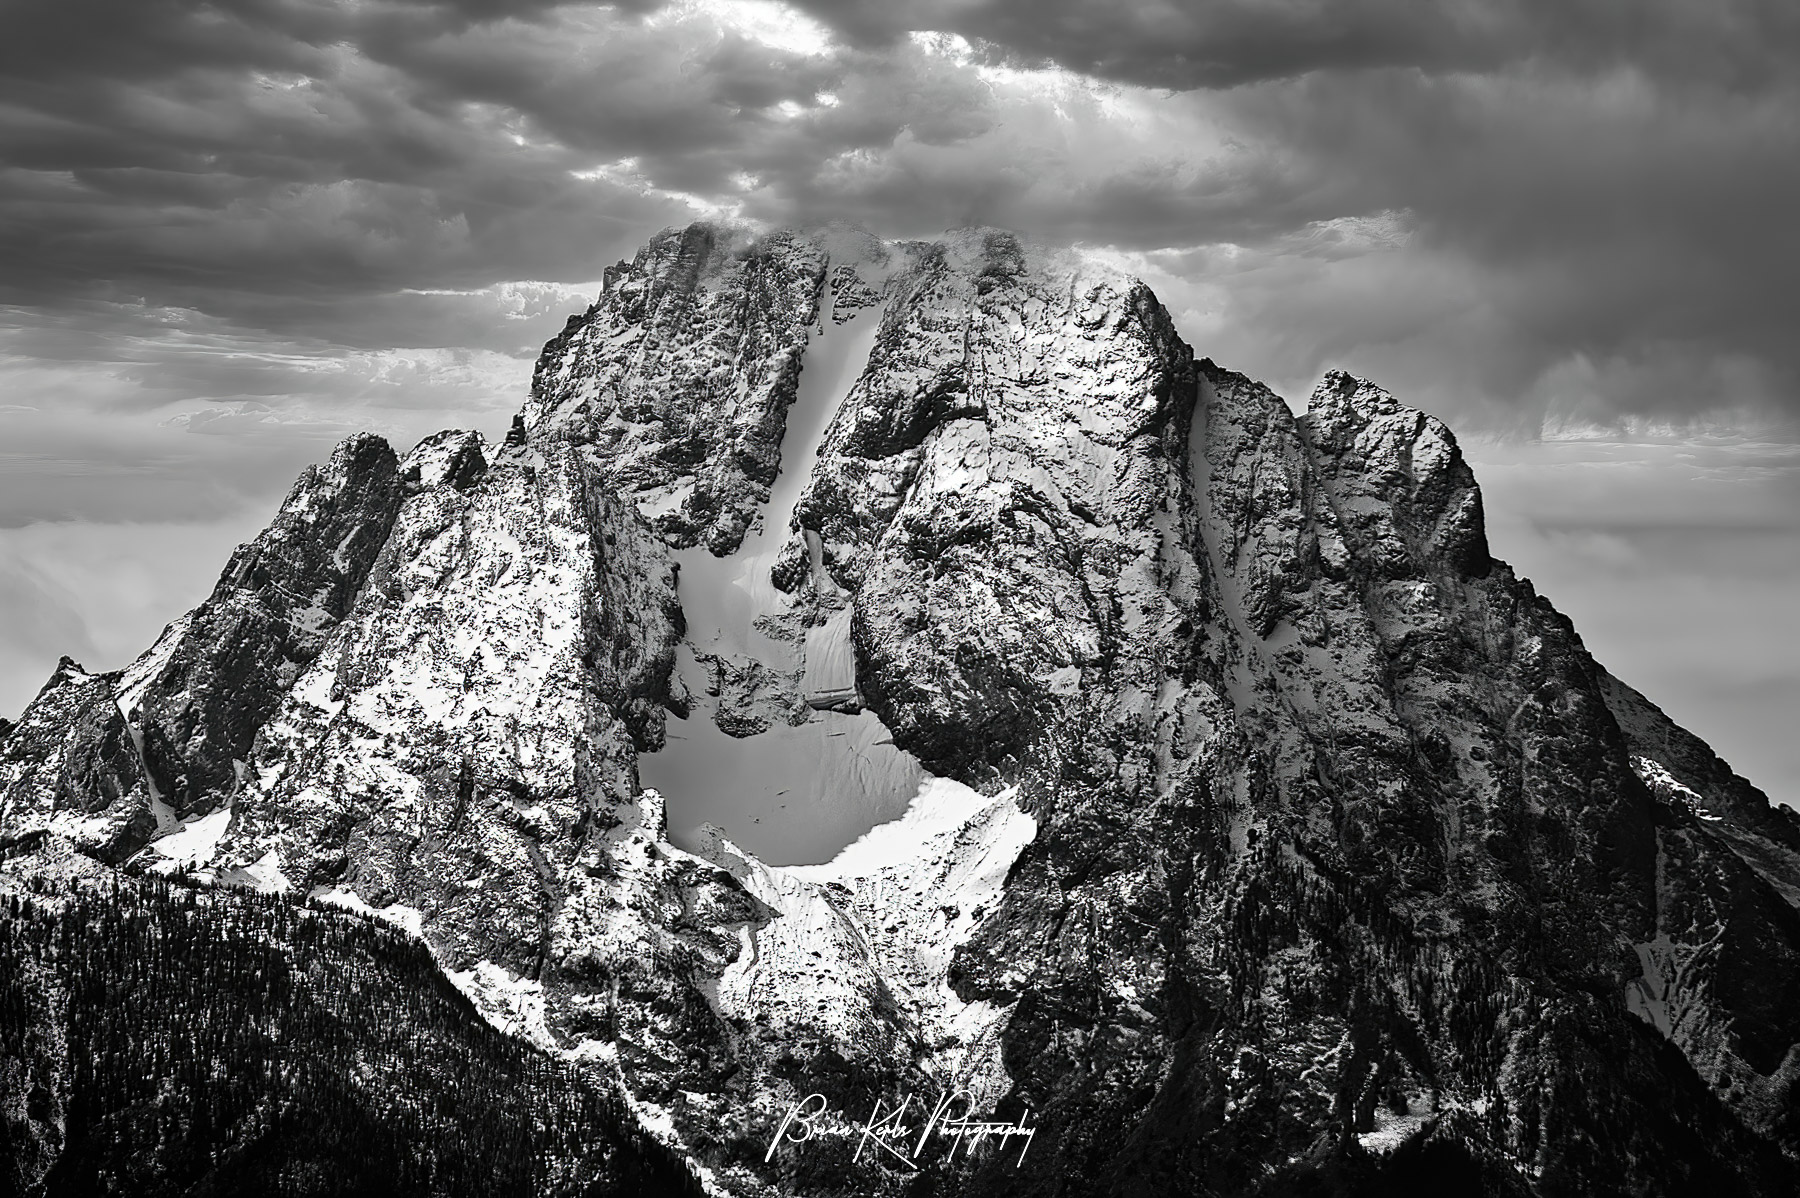
Don’t be afraid to shoot on cloudy days. Mountain weather is often a mix of sun and clouds, casting shadows across the peaks or lighting up the clouds. Cloud formations and cloudy skies introduce an additional visual element and can enhance the mood and drama of your mountain composition.
The direction of the light can greatly impact your mountain photograph. Side-lighting is where the sun is at a right angle to the subject and is preferable to direct light in the mountain landscapes. Side-lighting reveals more of the topography, emphasizing texture and details in the crevices, slopes, and rock faces of the mountain peaks. A polarizing filter can be used to darken the blue sky, reduce haze in the scene, and saturate the colors. Polarizers work best when the light source is at a 90-degree angle to the subject – just right for mountain peaks bathed in side-light.
An excellent way to convey the shape and form of the mountains is to utilize back-lighting and shoot with the sun directly behind the mountain peaks. This approach emphasizes the overall shape and scale of the peaks in favor of specific details or texture, with the most extreme form being a silhouette. Back-lit mountain scenes can be especially compelling and dramatic coupled with colorful skies at sunrise or sunset.
Generally, it is best to avoid front-lit mountains – especially at midday – as the direct light can hinder the ability to see texture and details like rocky pinnacles, crevasses, and glaciers can lose their form and shape. However, as it shows tonal or color relationships in the subject, front-lighting can be employed at sunrise or sunset when you get colored light and the peaks typically light up first, going from pink at dawn to red, then orange, and then yellow as the sun rises higher. These colored peaks can be combined with an interesting foreground for a mixture of tones and colors that work well with a front-lit mountain landscape.
- Put Down the Wide Angle Lens: Emphasize the size, scale, and details of mountain landscapes with a narrower lens (50mm, 70mm or 100mm focal length)
The grand vistas and sweeping views that can be encountered when exploring mountain landscapes makes it tempting to shoot with wide or super-wide angle lenses (10-24mm focal length). However, while the views are beautiful and impressive to the eye, the resulting photographs are often lackluster and uninspiring. The wide angle often doesn’t provide a clear focal point and fails to capture the true scale of the mountain range or peak, magnifying the foreground and minimizing the mountain’s epic size. A wide angle can be great when you are able to get fairly close to the central subject, however when shooting more distant mountain peaks, a longer focal length brings you closer to the action and fills the frame for a more impressive and impactful mountain landscape composition. You can also experiment by shooting the same landscape with different lenses and focal lengths – zooming in closer to highlight specific details on mountain peaks or backing off to encompass interesting foreground elements.
- Don’t Forget the Foreground: A compelling foreground will pull viewers into a mountain landscape scene making it easier for them to imagine being there in person.
Foreground interest is an essential element of composition for landscape and nature photography and can have a profound effect on the image. A close foreground captures the viewer’s attention, provides a sense of depth, context, and scale, and compliments the primary subject, usually the mountain peak. In addition to leading lines such as logs, branches, or rocks, to direct the viewer’s eye, bodies of water such as lakes, waterfalls, and streams are excellent foreground elements to include in your composition. It’s important to keep a sense of balance in your mountain landscape scene, letting the foreground draw viewers in without dominating the composition.
Don’t be afraid to change your perspective, as even a subtle shift can have a dramatic impact on the end result. Getting low and keeping the camera closer to the ground can produce bolder lines and compositions with objects in the foreground appearing larger and more dynamic. Try hiking or some light climbing to reach a different elevation that will provide an alternative perspective on the same scene. In many cases the most interesting and unique photographs will come from different perspectives, and this is especially true when shooting at popular mountain locations.
- Use a Small Aperture: Keep your mountain landscape photograph in focus from the foreground to the distant snow-capped peaks by using a small aperture.
Aperture is the opening in a lens through which light passes to enter the camera. Most cameras allow you to adjust the aperture which is expressed as a number, known as an “f-stop”. A larger f-stop (f/16 – f/22) means a smaller aperture with less light passing through the camera lens. In general, a small aperture limits background blur and allows you to keep more of the scene in focus. This is important with mountain photographs, and most landscape photography, as you want large “depth of field” with both the foreground and background elements in focus. While it is tempting to choose f/22, assuming the smallest aperture will be the sharpest, this may not provide the best results. Most lenses have a range in which they tend to be sharpest and that is typically a few stops away from their largest and smallest apertures. Test your lenses and know how they perform, but you’ll like see the best mountain landscape photography results between f/11 and f/16.
- Bracket Your Shots: Take different exposures of the same mountain landscape to account for the lightest and darkest portions of the scene and blend them together in Photoshop.
Bracketing is the practice of taking multiple shots of the same landscape scene (typically using a tripod), exposing one shot for the lightest part of the scene (the sky) and exposing another for the darkest areas (the shadows of a valley). The different exposures can then be combined in Photoshop for natural, even results. Bracketing your photos is a good practice as lighting and shadows can be tricky in the mountains. A mountain ridge can be totally in the shadows, but have bright sky right above it. Without bracketing this means that either the sky is “blown out” or the shadow detail is lost in the mountains as there is insufficient dynamic range to capture both accurately in one image.
- Use a tripod: Reduce camera shake and unwanted image blurring in your mountain landscape photos by using a tripod.
A tripod is instrumental in creating sharp mountain landscape photos by reducing unwanted image blurring due to camera vibration or shaking, especially when using slower shutter speeds and shooting in reduced natural light conditions at sunrise or sunset. Tripods are important when using larger, longer focal length telephoto lenses as the longer focal length magnifies any vibration created by the camera shutter and mirror, wind, or even the photographer. While lugging a tripod on your next photography adventure up and down rugged mountain trails can sound daunting and a bit cumbersome, there are some excellent compact and lighter weight models available and the improvement in your mountain photographs will be well worth it.
For more amazing fine art national park and Colorado landscape photos to enhance your home, office, or corporate walls please be sure to check out my galleries for wall art photo prints available for purchase.
Loved what you just read?
Become a VIP Insider and get more of the good stuff – exclusive tips, insider updates, behind-the-scenes stories, and special promotions delivered straight to your inbox.
Don’t miss out—our VIP members get the best of everything first